Showing posts with label Advanced. Show all posts

Monday, March 31, 2014

Lobster Ravioli, Homemade

♥♥♥ Advanced

I don't know about your family, but mine is part Italian and we're serious about our Pasta. I mean, my maiden name is Vivona for heaven-sake. We don't let a week go by without having SOMETHING made of semolina flour. And last week was no exception.

My mom and I were at work last week, working our tails off (anyone need a Realtor? Anyone? Bueller?) and we stopped to grab some brain food before we collapsed. Occasionally we'll get gift cards from vendors in a hope that we'll send them more business, and we had one for a local restaurant that we needed to use. After going through their menu online we settled on a Lobster Ravioli in a Creamy Vodka Sauce. It was delicious. Blow your mind good. But at the same time, seemed so simple and refined.

That's when it hit me. I have to make this. Now. Right now.

Okay, not right that minute because I was waist deep in work, but it definitely made its way onto my menu for the following week.

If you've been following the blog or very long, then you know that I usually like to try and find meals that don't take more than 30 minutes in the kitchen (because who has the time?), so if you're looking for another quick recipe you'll want to skip this one. It doesn't take a lot of hard work, just time... I found that it was perfect for a Sunday afternoon when everyone was napping after church. The house was quiet, and I didn't have anyone on my heels yelling, "hold me!"

FYI - You can't buy Lobster Ravioli in the frozen food section. Trust me, I looked. So you'll have to make it (or order out) if you get a hankering.  I suggest making a double batch and freezing the extras for later.

What you'll need:

For the Filling - 
1 Tbs. Olive Oil
2 Cups Lobster Meat, Cooked - Chopped roughly (I used the pre-packaged Lobster Meat from my local grocery store)
2 Pinches of Parsley
1/2 Lb. Ricotta Cheese
3-4 Tbs. Parmesan Cheese (You know I went crazy overboard with this one.)
Pinch of Salt & Pepper

For the Pasta Sheets- 
1 Cup Semolina Flour
1 Cup All-Purpose Flour (You can use a wheat flour if you would like)
2 Large Eggs
1 Tbsp. Olive Oil, Extra Virgin

How it's done: 

1. Start by making your pasta dough. Sift the flours together, and add them to your kitchen-aid mixing bowl. Add in the eggs and oil, and a Tbsp. of water. Using the dough hook or paddle attachment, mix on 2 for several minutes. Dough should look crumbly. Turn off mixer, and squeeze dough together with your hands. If dough forms a soft ball, turn it out onto the counter and kneed for 10 minutes. *If dough feels to dry, add 1 Tbsp. of water and mix for another minute. Repeat as necessary.

2. After kneading, wrap dough ball tightly in plastic wrap and set in the refrigerator for 30 minutes to chill.

3. For the filling - Add Olive Oil, Lobster Meat, and Parsley to a skillet on Medium Heat. Once warmed, remove from the heat and add the Ricotta and Parmesan Cheeses. Combine well, and season with salt and pepper to taste. Set Aside.

4. After dough has chilled, remove from refrigerator and knead for another 5-10 minutes. Pasta should feel silky and all of the graininess of the flour should be gone. Cut in half and roll into a large rectangle. Get the dough as thin as you can without tearing - as it sits on the counter it will tighten back up. Cut into ravioli squares or circles.

5. Take half of your ravioli squares and add 1 Tbsp. of filling to them. Brush the edges with egg wash, and then seal with another pasta sheet. Press edges firmly, and press with fork if needed. (If they aren't well sealed, they will open back up in the water while boiling.)

6. Lay all of your finished ravioli on a cookie sheet (do not let them touch each other) and place them in the freezer. I layered wax paper between them so that I could get more in the freezer. Freeze them for 1 hour, then put them in a large freezer bag, label and freeze.

7. To cook immediately: Cook the ravioli in a pot of boiling water for 7-8 minutes, until they float up.

If you're interested in making the Creamy Vodka Sauce that goes with them, check it out here!

Saturday, February 15, 2014

Crazy Good Smothered Chicken


♥♥♥ Advanced

We're just going to call it "Crazy Good Smothered Chicken" because it is CRAZY GOOD. As in, it was the perfect Valentine's Dinner. And was crazy good. Are you getting the idea?

I'm not usually a mushroom eater. (I usually slide them all off of my chicken piccata.) But I ate every.bite.of.this. So if there's an ingredient here that you just find to be repulsive, try it anyway because you'll likely like it.


What you'll need: 

FOR THE CREAMED SPINACH:
1 Large Bunch of Spinach Leaves
4 oz. Cream Cheese
1/4 C. Parmesian Cheese, shredded
2 Cloves Garlic, Minced
2 Tbsp. Olive Oil
1 Tbsp. Onion Powder
Salt & Pepper to taste

FOR THE SAUTEED MUSHROOMS:
8 Oz. Package of Mushrooms, Sliced
4 Tbsp. Butter
2 Tbsp. Olive Oil
2 Cloves Garlic, Minced
1/2 C. White Wine ****
Salt & Pepper to taste

FOR THE CHICKEN:
4-5 Boneless Skinless Chicken Breast
8-10 Slices of Mozzarella cheese, cut thinly
1 Tbsp. Garlic Powder
Salt & Pepper to taste

How it's done: 

1. Preheat oven to 350*F, and season both sides of chicken breasts with garlic powder, salt, and pepper. Bake for 15 minutes.

2. While chicken is in the oven, make the creamed spinach. Over medium heat heat the olive oil in a skillet. Add in the onion powder, garlic, and spinach and cook until spinach is wilted. When it's cooked through, add in the cream cheese and Parmesan. Continue cooking, stirring continuously, until the cream cheese has melted. Remove from heat.

3. In another skillet, melt the butter and olive oil over medium high heat. Add in the mushrooms and cook until browned. Do not season with salt until after the mushrooms have browned, or they will never brown. Deglaze the pan with the wine, and then add in the garlic, salt, and pepper. Cook until most of the wine is cooked out.

4. Now it's time to assemble your chicken! Divide up the spinach and mushrooms and cover over each breast. Top all of the chicken breasts with the slices of Mozzarella cheese. Cook in the over for another 12-14 minutes until the cheese has browned.

Seriously, this gets 5 stars in my household. I hope your's likes it too!
Enjoy!


**** For my friends who choose not to cook with wine, you can substitue 1/2 C. Chicken Stock + 1/2 Tbsp. of White Wine Vinegar.

Adapted from this recipe here.

Sunday, September 4, 2011

French Éclairs


♥♥♥ Advanced

If you've seen the Pate a Choux recipe, then you know where my inspiration for Éclairs came from. Aside from the fact that it's one of my absolute favorite desserts. My grandma makes them better than anyone (although, mine are prettier...ooooo!) and everyone requests hers when she's in town. However, these are a quick second, and are especially good when the pastry and chocolate are still warm. Seriously, try them warm with a cold Crème Patissiere... it will knock you off your feet. 

"I find it hard to disagree with the possibility that the height of luxury might not be an expensive car, a yacht in Monte Carlo, or a villa in Jamaica, but may instead be a really, really, really good chocolate eclair." -Andre K. Crump

What you'll need: 

Eclair Shells: 
* Pate A Choux Sucree (Cream Puff Dough) 
* 1 Egg, for the egg wash
* A pinch of Salt

Crème Patissiere
* 6 Egg Yolks
* 1/2 Cup Sugar
* 6 Tablespoons of Flour
* 2 Tablespoons Cornstarch
* 2 Cups of Milk
* 2 Tablespoons of Vanilla Extract

Chocolate Icing
* 10 oz. (1 1/4 Cup) Dark or Milk Chocolate 
* 3 Tablespoons Milk
* 4 Tablespoons Unsalted Butter, cut into small pieces
* 4 Tablespoons Sugar

How it's done: 

Éclair Shells: 
1. Preheat the oven to 400*F, and butter a baking sheet. 

2. Using a 1/2 Inch Nozzle, pipe 3-4 inch long logs of Pate a Choux Dough on the sheet. Allow adequate spacing! 

3. In a bowl, beat the egg and salt to form a glaze. Brush the top of each log with the glaze. Use the back of a fork dipped in the egg wash to score the top of each log. Drag prongs lightly across the top of the logs length, creating rows of shallow lines. 

4. Bake for 25-30 minutes, until light golden brown, and somewhat crisp, but not hard. Remove from oven and cool on a wire rack. 

Crème Patisseiere: 
1. In a bowl, whisk eggs and sugar together until they thicken and are pale yellow. Fold in the flour and cornstarch. 

2. In a saucepan, bring the milk to a low boil, then pour hot milk into the bowl of egg yolks. Stir well. Then pour mixture back into saucepan and heat to a boil. Lower heat and allow Crème to thicken, stirring regularly. When thickened, remove pan from heat, pour into a bowl and mix in vanilla extract. Cover the creme with parchment or saran wrap, which prevents a skin from forming on top, and chill to cool. 

Chocolate Icing: 
1. Slowly bring butter, sugar, and milk to a low boil in a saucepan, stirring continuously to make sure sugar dissolves. Add chocolate and remove from heat. Stir until chocolate has melted and icing is a smooth texture. Allow to cool some before using. 


To Assemble: 
1. Make a horizontal slice down the middle of the length of the Eclair shell. Pipe or spoon Creme Patissiere into the cavity of the Eclair shell. Top with the other half of the shell. Spoon the warm chocolate on top of the eclair, or dip the eclair into the frosting. 

Wednesday, July 13, 2011

Cream Cheese Crepes with Blueberry Compote

♥♥♥ Advanced

I can remember being nine years old the first time I ever tried a crepe. It was a cream cheese crepe with a strawberry syrup on top, topped off with whipped cream.  I can remember thinking that I would never eat pancakes ever again as long as I lived. To my dismay, many breakfast restaurants don't offer cream cheese crepes for breakfast. I've spent many years searching for a breakfast place close to home that serve my favorite dish, and while I've found a few, they just aren't ever as good as I remember.

I hadn't really considered making them until the other night when I was watching some show on Food Network (one of the ten shows that Bobby Flay is in) and Bobby Flay suggested that very few people could make a "perfect crepe" because they are so temperamental.  Well Bobby Flay, I'm here to say you're wrong. A crepe doesn't have to be perfect!  It doesn't have to be perfectly browned, or even the same exact size as the others on the plate... it just has to taste good. So, I dedicate this post to Bobby Flay, someone I generally admire (even when he's wrong).

I'll be posting a fruit compote recipe here, because it's a good recipe to have all by itself.  You can use nearly any fruit, and can use them in so many ways. I prefer breakfasts, and over ice cream, but you can use them nearly everywhere.


What you'll need:


For the Crepes - 
1 Cup Flour
1 1/2 Cup Milk
2 Eggs
1/2 Cup Sugar
1 Teaspoon Salt
1 Tablespoon Oil (I used vegetable oil)

For the Filling-
8 oz. Cream Cheese (One bar)
2/3 Cups of Powdered Sugar
1/2 Teaspoons of Vanilla
1/2 Teaspoon Lemon Zest - or Lemon Juice

How it's done: 

1. Beat your eggs in a large bowl. Add in the flour, milk, sugar, salt, and oil. Blend until combined.  I just left the mixer (with whisk attachment) on while I went and mixed up my filling.

2. In medium size bowl, blend cream cheese, powdered sugar, vanilla, and lemon juice. Mix until combined and creamy. Set aside.

3. Begin making your blueberry compote (Or any fruit compote!).

4. Heat a 6-8 inch skillet with 1 teaspoon oil over medium-high heat. Once heated, remove the pan from the heat, drop in 2-3 Tablespoons of crepe batter.  Tilt the pan in circles to cover entire base of pan, and return to heat. Leave the crepe to cook for 45 seconds to 1 minute. Use a spatula to turn it over, and cook  for 30 more seconds.

5. Once removed from the pan, put your crepe on a plate covered with paper towel.  Your crepe will expire some so your paper towel might be wet when you're all done.  That's okay, the heat and expiration make your crepes really nice and soft, which makes them easy to roll!

6. After all of your crepes have been cooked, you can start to fill them and roll them up! (Roll the pretty side of the crepe outward of course!) I had 6 in. crepes, and i filled with three tablespoons of cream cheese mixture, but you can use as much or as little as you would like.


7. Top with your fruit compote and you're done! It's as simple as that, and they taste fantastic!

Enjoy!

Friday, July 1, 2011

Strawberry Rhubarb Ice Cream

♥♥♥ Advanced
I sort of had one of those "AH-HA!" moments a few days ago, where I imagined combining a few of my favorite summer things into one treat.

Strawberry + Rhubarb + Ice Cream = WINNER!

Who doesn't love Strawberry Rhubarb anyway, but combined with ice cream and you'll never want plain strawberry ice cream ever again.  I promise.  I tasted it for the very first time this morning for breakfast... and I might even have to "taste" it again for lunch!

Trust me when I say, if you make it once you'll probably make it a few more times this summer!

*Just a note: You can make this without an ice cream maker, but it's a lot more work.  I don't own one, but my sister was kind enough to let me borrow hers (Thanks Ash!) so it made the process a lot more fun! Now I might have to go buy one! 

What you'll need:

(The measurements may need to be adjusted to fit your ice cream maker, the one I used was 1.5 Pint maker)

  • 3 Cups of Chopped Rhubarb (1 Inch pieces or smaller) 
  • 2 Cups of Strawberries - Hulled and quartered
  • 1 Cup of Whole Milk
  • 4 Teaspoons of Corn Starch
  • 1 1/4 Cups of Heavy Cream
  • 2/3 Cup of Sugar (For the Ice Cream Base
  • 1/2 Cup of Sugar (For the Strawberry & Rhubarb) 
  • 1 Teaspoon Vanilla Extract
  • 2 oz. of Cream Cheese
  • 1/8 Teaspoons of Salt

Boiling the rhubarb.
How it's done: 

1. Wash and prepare rhubarb and strawberries.

2. Bring 1/2 Cup of Sugar & rhubarb to a boil over medium-low heat in a saucepan. Once boiling, add strawberries to the mixture and bring to a boil again. Turn off the heat. The goal is not to make jam, but it's okay if it gets a little thick. Allow this to cool a bit while you make the ice cream base.

After adding the strawberries. 
3. Mix well in a small container 2 Tablespoons of Milk and Corn Starch. Set Aside.

4. In a medium saucepan, over medium heat, bring the milk, cream, and remaining sugar to a boil. Turn off the heat and add the cornstarch mixture, whisking continuously. Turn the heat on low and whisk until the mixture gets thick and coats the back of a spoon. You should be able to see a trail when you drag your spoon through it.

Melting the cream cheese. 
5. Put the strawberry rhubarb mixture through a strainer. Discard the chunky pieces, and fold 1 1/2 Cups of the saucy mixture into the Ice Cream base.

6. Once the ice cream base and strawberry rhubarb are mixed well, add the vanilla, salt, and cream cheese. Whisk the mixture until the cream cheese is melted. Remove from heat and allow to cool for a few minutes.

7. Pour the ice cream into a refrigerator safe bowl, and stick in the freezer for 5 minutes. After 5 minutes, stir the mixture and return to the freezer for 5 more minutes. Do this for 25 minutes total. After the 25 minutes, double check that it is completely cold and if it is throw it in your ice cream maker (following the makers directions!).

8. Wait for your maker to churn your ice cream! When it's all done, put it in an air tight container and move it to the freezer!

ENJOY!

Saturday, June 18, 2011

Super Saturday Chicken Enchiladas

♥♥♥ Advanced


Years and years ago, my mom picked up this recipe at a Relief Society activity and ever since it's been a cherished family favorite. It's been comfort food in our family, and gets made only a few times a year.  I don't eat enchiladas outside of our homes, because no other enchiladas compare!

Trust me when I say, you'll love these as much as my family does.  And the best part is that it makes so much, you're bound to have left overs!

What you'll need:

  • 4-5 Boneless Skinless Chicken Breasts
  • 1 Can Mild Enchilada Sauce
  • 1/4 Cup Ketchup
  • 1 1/2 Tablespoons Honey
  • 1 Can Cream of Celery Soup
  • 3/4 Cups of Sour Cream
  • 8 Ounces (or more) grated Cheddar Cheese
  • 10-12 Medium Size Flour Tortillas
How it's done: 

1. Broil the chicken breast until cooked.  Dice chicken into small pieces. Mix the chicken with the enchilada sauce, ketchup, and honey in a medium saucepan and heat. 
2. Preheat oven to 350*F. 

3. Mix soup, sour cream, and cheese in a medium sauce pan and stir.  Heat until blended and melted. 

4. Microwave the tortillas between two paper towels for one minute, or until heated. 

5. Spread a small amount of the cheese mixture onto the bottom of the pyrex dish to avoid sticking. 

6. Place two tablespoons of cheese mixture onto tortilla shell. Spoon 1/8 Cup chicken mixture into tortilla shell. Sprinkle with cheddar cheese. Roll the tortilla and place it seam down in the pyrex dish. 

7. Once all of the tortillas are rolled and placed in the pyrex, spoon the rest of the cheese soup onto the top of the enchiladas. Sprinkle with cheddar cheese.  

8. Cover with foil, and bake for 30 minutes. 

Fiesta Time! 

Wednesday, June 8, 2011

Strawberry Rhubarb Torte

♥♥♥ Advanced
My husband always seems to ask about rhubarb when summer is at the door.  His Grandma always spoiled him with homemade strawberry rhubarb pies while he was growing up, and now he affectionately believes that they are just another part of summer.  It sure is good that he married me, because no one else in my immediate family even likes rhubarb, and sadly I had never even heard of it before him. Even though I too am a fan of a strawberry rhubarb pie, I felt like I could dress up the typical pie and make it something even better.  I'm not sure you can even compare the two since this is so far from a typical pie, but the flavors remain the same and the texture is fantastic!

The texture and flavors of this torte will have you asking for more and more.  It's healthy because there is rhubarb in it, right?

What you'll need:

  • 2 (or more if you want it more sour) Cups Fresh Rhubarb (Cut into one inch pieces) 
  • 1/3 Cup of Water
  • 4 Tablespoon & 4 1/2 Teaspoons Sugar (Divided) 
  • 3 Tablespoons plus 1 Teaspoons Strawberry Gelatin
  • 2 Cups Whipped Cream 
  • 14 - 20 Lady Fingers (Halved)
Glaze:
  • 1 Teaspoon Cornstarch
  • 1 Teaspoon Cold Water
  • 1/2 Cup Fresh Sliced Strawberries


How it's done: 

1. In a small saucepan bring to a boil the water, rhubarb, and sugar. Once boiling, reduce to a simmer and leave uncovered for 6-8 minutes (rhubarb will be soft). Cover and refrigerate 1/3 Cup of the water to use in the glaze later.


2. Puree rhubarb and remaining mixture in the food processor. Return the puree to the saucepan, bring to a boil, and stir in the gelatin until disolved. Refrigerate for 15 minutes or until slightly thickened.

3. Gently fold whipped cream into the rhubarb mixture.

4. Grease a tall, flat bottomed dish (or springform pan if you own one).  Place one layer of lady fingers on the bottom of the pan.  Spread half of the rhubarb mixture into the pan on top of the lady fingers. Repeat for second layer. Refrigerate torte for 8 hours or overnight (I suggest overnight so the lady fingers can soften a little.)

5. Place remaining rhubarb water into a small saucepan with the remaining sugar. Bring to a boil and add cornstarch. Stir until smooth.  Stir and boil for 2 minutes or until thickened. Let cool. Toss glaze with strawberry slices.  Use strawberries to top the torte.

6. Enjoy!  Please leave your comments and let me know what you think!


Sunday, March 20, 2011

An Edible Paste... Finally!

♥♥♥ Advanced
I can promise you one thing, I NEVER tasted the paste in my kindergarten classroom.  My husband however, is a totally different story.  And he promises that it really did taste good.  In homage to my husband I've begun to play with Gum Paste - a paste that's acceptable to eat.  Finally.

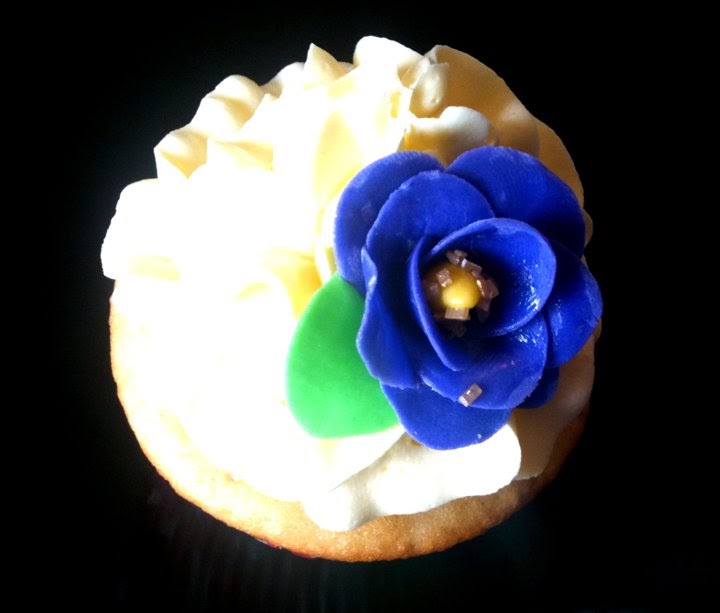
I made these gum paste flowers a few days ago, and added them to my cupcakes.  It brought a whole new level to my cupcakes and we're actually a lot of fun to make.  My daughter thought so too (I let her play with it too!),  and she definitely ate her fair share.

 I've had a few friends who have asked me how to make these little gems, so I figured it would be a good idea to put together a little tutorial (with what limited knowledge I have) on how they are made.  This really was my first attempt at these, so I'm sure there are more professional and easier ways to do this if you have all of the right tools - I'm just not there yet.  So we'll make due with what we have.  Sound good? Let's get started!

Here's what you'll need:
  • Food Coloring, or Icing Color, in the colors you prefer (Here's what I like)
  • A box of Tooth Picks (or dowel rods for larger flowers for cakes)
  • One Egg White (As an adhesive - although water can be used as a substitute, it generally doesn't hold as well.)
  • A paintbrush for applying the egg whites
  • If necessary, fondant cutters (shapes) or a knife.
  • If you want some texture in the centers of your flowers, you can use decorators sugar, etc.
  • Green Floral Foam (It makes it easier to stick your flowers in while they dry)
  • Rolling Pin
  • Wax Paper

To begin, mix up your Wilton's Gum Paste per the directions on the side of the can.  If you've purchased the pre-made gum paste you can skip this step.

Next, separate gum paste into several different pieces, depending on how many colors you plan to use.  I suggest about an 1/8 C. per color (So very little amounts if you're only making 10-12 flowers).  Generally, you'll be using more pink, blue, etc. than you will green or yellows for the leaves or stigmas. Add a little color to each section, and knead until they are the colors you like. (The amounts I'm showing are much less than 1/8 C, but I've been using them...)

Depending on the size flowers you will be making, the amounts may vary but for purposes of this tutorial, we'll be making 10-12 quarter size flowers (small enough to not be too heavy for the toothpicks). Once your gum paste is mixed, separated, and colored, we can begin making some flowers!

Lay out a sheet of wax paper, and dust it with a little powdered sugar so your gum paste doesn't stick.  Make sure that while you aren't using each color you keep them in airtight containers or Ziploc bags lined with shortening because the gum paste dries out VERY QUICKLY.

Take a *pinch* of yellow for the stigma, and gently roll it in between your two hands.  If your hands are too warm it will melt and stick to your palms.  You may need to dust your hands with powdered sugar, but remember that you need to work quickly because the paste hardens fast.

Once the stigmas are rolled to the shape you would like, stick the toothpick in the bottom end, and sit up in your foam to dry for 20-30 minutes.  I used a jar of rice because I didn't realize I was out of my floral foam, so anything will work as long as they can stand upright.  They don't need to be perfect, they can literally be any shape you would like!

Once the stigmas are dry, you can begin working on the petals.  This is when it gets to be a lot of fun.  You can make your flowers look any way that you would like! A one petal Calla Lily, punch outs from the fondant cutters, or even just a normal flower with hand shaped petals. Just roll out the paste color of your choice to the thickness you desire (I like 1/16 in), and start cutting!

*Preface: My gum paste has been colored for a few days, so it's a little more brittle than it would be if it were used the same day it were made.  My edges may be a little more rough than yours should be.

**Suggestion:  Make these the day before you serve the cupcakes, and leave them out over night. add them to your cupcakes just before serving.  If they are left covered or refrigerated they will wilt... go figure!

Calla Lily:
Roll out your colored Gum Paste to the thickness you desire.

Cut out desired shape.  Tear drop shape is best for Calla Lily's, but you can see here that I used a pointier shape. 

Pick up the petal and smooth and flatten the edges. Draw a line down the center lightly with your knife. This will allow the petal to bend easier in the middle.

Brush a small amount of egg white on the bottom half of your petal.  The egg white acts as an adhesive.

Be careful not to press too hard and pull the stigma off of the toothpick.  Between your warm hands and the moisture of the egg white, the stigma will become soft again. As you gently wrap the petal around the stigma gently smooth edges together.  You may have excess petal at the bottom of the flower but that's okay, just gently pinch off the excess and pull toward the bottom of the toothpick to remove it.
 
This should be what your Lily looks like after you've smoothed the petal around the stigma.

I like to lay the Lily's down on a plate to dry, in order to keep the petal upward. Once the flower is dry again (10-20 minutes) you can add a leaf if desired. (Leaf instructions below)
You can either leave the tooth picks in the flowers and use them as a support in the cupcake (I would suggest it), as well as making it easier to remove them from to cupcakes.  They are edible, but I would not suggest it since you use raw egg white as an adhesive. 

Six-Petal Flower

Again, you can remove the toothpick after it hardens, or leave it in, but my suggestion would be that you leave them in to add support while they rest in the frosting.
Roll out six pinches of gum paste, some larger and some smaller, into balls. 
Flatten each ball.
After smoothing and flattening each edge of each circle, wipe the bottom half of each in egg white.

Wrap one petal around the stigma, and flatten at the bottom.
Add another petal, overlapping the previous petal until three completely cover the stigma.
Add the final three petals at the intersecting points, and smooth the bottoms of each.
Wipe completely with egg white and allow to harden (10-20 minutes).

Let dry in upward position to keep the petals from flattening against any other surfaces.

Last, but certainly not least...
Leaves:
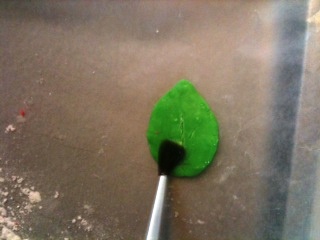
Just like the petals, begin with a ball, and flatten and form into a leaf.


Add egg white to bottom half of leaf...
Smooth onto the base of the flower.  I like to use it in a place where I feel like the flower may be uneven.
 
Sorry this photo is the wrong direction, but you get the idea. 
Let stand to dry - I like the completed flower to be able to dry over night.
Once the flowers have dried over night they should be almost rock hard.  You still have to be fairly gentle with them, but it should be pretty easy to stick them into your frosting and cupcakes.

And here's your finished product!
If you wish to have colored sugar on the stigmas, then just before you go to put them on the cupcakes, wipe the stigma in egg white and dip in sugar.

So, it's a far cry from those days in kindergarten when my husband would taste the paste, but I'm willing to bet he would prefer these anyway.  I hope you have as good of an experience as I have had making these beautiful little gems.  Please leave your comments below and let me know what you think or if you have any questions.

Good luck!