Showing posts with label Cake. Show all posts

Tuesday, April 1, 2014

Cheesecake Trifle

♥ Beginner

My dad believes that you're never prepared to attend a party until a trifle has been made. He right too. They not only hit the spot for flavor, combining all of our favorite things in one, but they also look really beautiful and professional. Let's be honest, it's hard to screw up a trifle.

This one just happens to include all of my children's favorite things. A spin on the traditional red, white, and blue trifle that you see around the fourth of July... this one was gone in a matter of two days. Enjoy!

What you'll need: 
1 Angel Food Cake
1 Box of blueberries
1 Box of Strawberries
1 Box of Raspberries
1 Instant Jell-O Packet, Cheesecake Flavor
2 Cups of Milk
1 Cool Whip, 12 oz.
2 Butterfingers Candy Bars, crushed


How it's done: 

1. Start by preparing your pudding. Make the pudding using the Jell-O packet and the milk. Set in the fridge for 10 minutes.

2.Cut the angel food cake into bite size pieces. Cut off the tops of the strawberries and quarter them. Rinse all of the fruit, and set aside.

3. Once pudding has set, remove from fridge and gently fold in the cool whip. Once combined, it's time to assemble the trifle!

4. Layer in the following order - Angel Food Cake, Fruit, Pudding mixture, Crushed butterfingers bar. Two layers, and whalah! Enjoy!

Wednesday, January 25, 2012

Carrot & Cream Cheese "MuffCakes"


♥ Beginner

Originally, these were called inside-out cupcakes because the frosting is on the inside... however, these are more like muffins (because they are great for breakfast!) with a cream cheese filling. Now we call them "MuffCakes".

These were a great hit at the ward linger-longer, and although I anticipated bringing some home because they aren't very pretty, they were all gone before we snuck out. If you're a carrott cake lover, or cream cheese lover (like myself) then you'll love these sweet little muffcakes as much as we do.

I originally made these from scratch, making my own carrot cake, and they turned out pretty good. But the next time, I made them from a Duncan Hines Decadent box mix and not only were they easier, but they were much more flavorful. At roughly $3.00 a box, it was worth it for the ease. If you want the recipe from scratch, let me know and I'll post it. Otherwise, here's my recipe using the box mix (because let's be honest, you're going to take the easy route too.)

*Btw, I stole these from King Arthur Flour (but mine are better, cough) 


What you'll need: 

  • 1 Box Duncan Hines Decadent Carrot Cake Mix (New!
  • 3 Eggs
  • 1/4 Cup Vegetable Oil
  • 8 oz. Package of Cream Cheese (or Neufchatel Cheese)
  • 1/4 Cup Sugar
  • 1/2 Teaspoon Vanilla
  • 1/4 Teaspoon Lemon Juice

How it's done: 


1. Preheat your oven to 400*F, and grease or paper your muffin tins. (If you grease, your muffins will rise more and be fuller looking.)

2. Mix up your cake mix with the eggs and oil. Set aside.

3. Combine softened cream cheese, sugar, vanilla, and lemon juice until well blended. 


4. Pour 2 Tablespoons of carrot cake batter into muffin tins. Top with heaping tablespoon of the cream cheese mixture, and then cover with remaining batter. (You want the muffin tins 3/4 of the way full - or more if you're like me.)

5. Tap your muffin tin lightly on the counter to release any air bubbles.


6. Sprinkle the top with course white sparkling sugar, because who doesn't love a little extra sugar??

7. Bake for 20-25 minutes. Baking times will vary. Once baked, let them rest in the muffin tin for 5 more minutes before moving them to a cooling rack. Enjoy!

These little gems are perfect when eaten still warm, although they are just as good when they've had some time to cool too! 

Wednesday, October 5, 2011

Pumpkin Cheesecake!

♥♥ Intermediate 


It's been nearly a month since the last time I posted on the blog, but I've had good reason. We just found out that we're expecting baby #2 (please, hold your applause and excitement). With that in mind, I'm sure you can figure out why I haven't been baking. (If you can't, I'm tired and I smell EVERYTHING... which really isn't great on your stomach if you're in the kitchen with fruity and spicy smells.) 


However, I'm determined to get back in the kitchen and continue to spread fabulous recipes to all the world. You're welcome. 


I decided to make a Pumpkin Cheesecake for family home evening this week, and it turned out really good. To be honest, I thought it would be so similar to a pumpkin pie that adding cream cheese wouldn't even matter, but it was very uniquely a cheesecake... and very, very, very tasty. If you're looking for a good pumpkin recipe, you should definitely try this one. And aside from the insane amount of cream cheese you'll need, it's a very short list of ingredients. This does take considerable time to make, so start late in the evening and sleep while it's cooling. Happy baking!  (I need to give some credit to Mrs. Martha Stewart too, because I stole this from her...) 


What you'll need: 
For the crust... 

  • 10 Whole Graham Crackers (crushed)
  • 1/4 Cup Granulated Sugar
  • 4 Tablespoons Unsalted Butter, melted
For the filling: 
  • 4 Packages (8 oz. bars) Cream Cheese, very soft
  • 1 1/4 Cup Granulated Sugar
  • 3 Tablespoons All-Purpose Flour
  • 1 Cup Canned Pumpkin Puree (I added WAYYYYY more than 1 Cup, but I probably should have left it at that.. ) 
  • 2 Tablespoons of Pumpkin Pie Spice
  • 1 Tablespoon of Vanilla Extract
  • 1/2 Teaspoon Salt
  • 4 Large Eggs, Room Temperature


How it's done: 

***To prevent the top from cracking, be careful not to overmix the batter, and do not open the oven door while the cake is baking or cooling inside the oven.


  1. Preheat oven to 350 degrees, with rack in center. Assemble a 9-inch nonstick springform pan, with the raised side of the bottom part facing up.
  2. Make the crust: In a medium bowl, mix cracker crumbs, sugar, and butter until moistened; press firmly into bottom of pan. Bake until golden around edges, 10 to 12 minutes. (I put the graham crackers, sugar, and butter in the food processor on pulse - and it was SOOOO easy!) 
  3. Make the filling: With an electric mixer, beat cream cheese and sugar on low speed until smooth; mix in flour (do not overmix). Add pumpkin puree, pie spice, vanilla, and salt; mix just until smooth. Add eggs one at a time, mixing until each is incorporated before adding the next.
  4. Place springform pan on a rimmed baking sheet. Pour filling into springform, and gently smooth top. Transfer to oven; reduce oven heat to 300 degrees. Bake 45 minutes. Turn off oven; let cheesecake stay in oven 2 hours more (without opening).
  5. Remove from oven; cool completely. Cover with plastic wrap; refrigerate until firm, at least 4 hours. Un-mold before serving.

I really loved this recipe, it was a great combination of the flavors that I have always loved, and the texture of cheesecake (and honestly, there is no better texture). Try it. You'll like it. 

Wednesday, June 8, 2011

Strawberry Rhubarb Torte

♥♥♥ Advanced
My husband always seems to ask about rhubarb when summer is at the door.  His Grandma always spoiled him with homemade strawberry rhubarb pies while he was growing up, and now he affectionately believes that they are just another part of summer.  It sure is good that he married me, because no one else in my immediate family even likes rhubarb, and sadly I had never even heard of it before him. Even though I too am a fan of a strawberry rhubarb pie, I felt like I could dress up the typical pie and make it something even better.  I'm not sure you can even compare the two since this is so far from a typical pie, but the flavors remain the same and the texture is fantastic!

The texture and flavors of this torte will have you asking for more and more.  It's healthy because there is rhubarb in it, right?

What you'll need:

  • 2 (or more if you want it more sour) Cups Fresh Rhubarb (Cut into one inch pieces) 
  • 1/3 Cup of Water
  • 4 Tablespoon & 4 1/2 Teaspoons Sugar (Divided) 
  • 3 Tablespoons plus 1 Teaspoons Strawberry Gelatin
  • 2 Cups Whipped Cream 
  • 14 - 20 Lady Fingers (Halved)
Glaze:
  • 1 Teaspoon Cornstarch
  • 1 Teaspoon Cold Water
  • 1/2 Cup Fresh Sliced Strawberries


How it's done: 

1. In a small saucepan bring to a boil the water, rhubarb, and sugar. Once boiling, reduce to a simmer and leave uncovered for 6-8 minutes (rhubarb will be soft). Cover and refrigerate 1/3 Cup of the water to use in the glaze later.


2. Puree rhubarb and remaining mixture in the food processor. Return the puree to the saucepan, bring to a boil, and stir in the gelatin until disolved. Refrigerate for 15 minutes or until slightly thickened.

3. Gently fold whipped cream into the rhubarb mixture.

4. Grease a tall, flat bottomed dish (or springform pan if you own one).  Place one layer of lady fingers on the bottom of the pan.  Spread half of the rhubarb mixture into the pan on top of the lady fingers. Repeat for second layer. Refrigerate torte for 8 hours or overnight (I suggest overnight so the lady fingers can soften a little.)

5. Place remaining rhubarb water into a small saucepan with the remaining sugar. Bring to a boil and add cornstarch. Stir until smooth.  Stir and boil for 2 minutes or until thickened. Let cool. Toss glaze with strawberry slices.  Use strawberries to top the torte.

6. Enjoy!  Please leave your comments and let me know what you think!


Monday, June 6, 2011

Lady Finger Fancy!

♥ Beginner
Lady Fingers are the base for MANY great dessert dishes, including tortes.  I am planning on making a torte later on today, and didn't want to waste my hard earned $$ on a package or two of expensive lady fingers (especially when I already have all of the ingredients on hand at home). Okay, okay, it's really the thought of getting my almost-two year old in the car and traveling to the grocery store during nap time. No thanks! So I figured I would whip up a few batches and get them ready for my torte later on.

These little beauties only take about 30 minutes to make, even though it seems like there are a lot of steps.  Don't judge mine based on the photo, I left them in the oven 45 seconds too long and browned the edges a little more than I would have liked.  Your patience actually determines the shape and size of these fingers, and as you could tell I was just in a hurry to get them done.  There is a pan you can buy that shapes them for you, but I don't really see much sense in that since more than likely you'll be covering them with a custard or something else tasty. If you are interested, here's where you can get one.

What you'll need:
  • 4 Egg Whites, Large
  • 2/3 Cup Sugar
  • 2 Tablespoons Sugar
  • 4 Egg Yolks, Large
  • 1 Cup All-Purpose Flour
  • 1/2 Teaspoon Baking Powder

How it's done:

1. Preheat your oven to 400*F, and butter your cookie sheet.  (You can use parchment paper, but I'm a fan of butter or shortening because they add a moisture to the bottom of the cookie)

2. Beat your egg whites to soft peaks, and add 2 Tablespoons of sugar.  Beat until the egg whites form stiff peaks. Move the egg whites to a separate bowl (I liked using my glass measuring cup).

3. Mix the remaining sugar with egg yolks until thick and almost colorless.  Remove bowl from mixer, and gently fold in HALF of the egg white mixture.

4. Sift flour and baking powder into the mixture, and gently fold in.  Once completely mixed up, fold in the second half of the egg whites.

5. Put the mixture into a piping bag with a 1/2 in. tip. and pipe onto the cookie sheets. I suggest 2 inches long, but they can be as long as you would like.

6. Bake for 6-8 minutes, until the edges turn golden brown.  Let cool before removing.

Enjoy!!!

Thursday, May 19, 2011

Cheesecake Balls - A twist off of the Cake Ball!

♥♥ Intermediate
We've had endless conversations about Cake Balls, Cake Pops, Cupcakes, etc.  And honestly, I was beginning to feel like cake was getting tiresome, and we needed to try something new and fresh. (As if!)


So last night, I decided to try making cake balls with cheesecake instead, and it was AWESOME! And because I'm the "Queen of Ease" this was actually even easier than if I had made cake balls.  I bought a pre-made cheesecake (so I skipped the entire step of making it myself), and we were good to go in about 30 minutes!


If you love cheesecake, like I do, you'll LOVE these little bites!


What you'll need: 

  • 1 Cheesecake (Already made!) 
  • 4 Graham Crackers
  • 1 Bag of Candy Melts (I chose milk chocolate, but any would work) 
  • Extra: I also used red candy melts for the design, but you can use any color you want or none at all.  You could also use sprinkles, etc. 

How it's done: 


1. Get your pre-made cheesecake ready (I cheated and brought one home from the freezer section of the grocery store, sshhh don't tell.) Mine was a small cheesecake - serving 8 people - and it made about 4 dozen balls.  


2. Crush your graham crackers.  Place them in a ziplock bag, and then smash them with the back of a large spoon.  Pour them into a small bowl. 


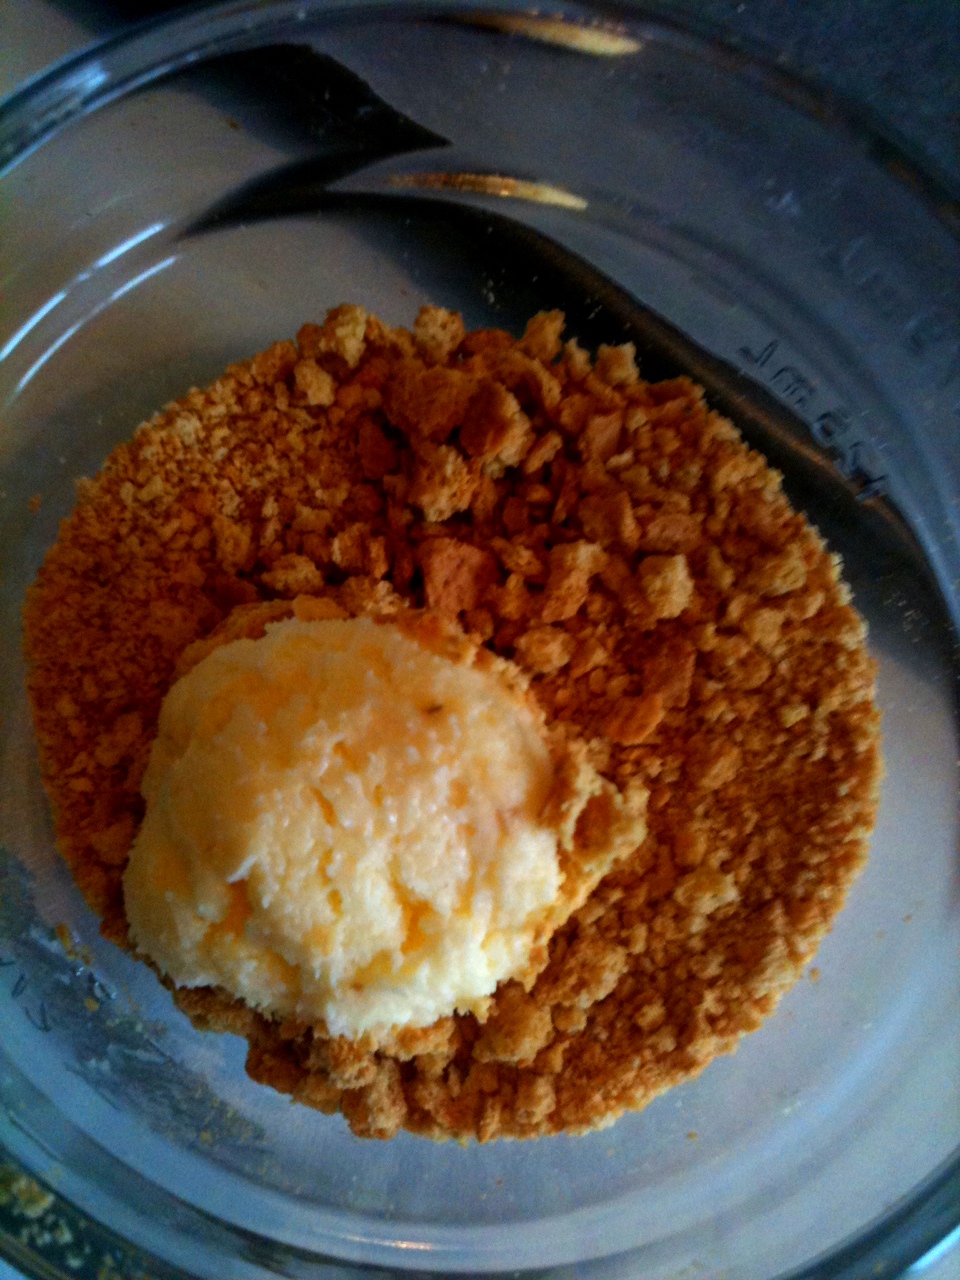
3. Scoop out cheesecake with your cookie dough baller, and then roll slightly in your palms. Drop them into your graham cracker crumbs and roll. 


4. Place the balls onto a wax paper lined cookie sheet.  Stick them in the freezer for 20 minutes to harden. 


5. Just before your balls are ready to come out of the freezer, melt your candy melts (not your decorative candy melts)  Place them in a tall narrow container to dip your balls in, and melt usually 30 seconds at a time. 


6. Take balls out of the freezer, and dip them carefully in the chocolate.  Place them on another lined cookie sheet to harden. (Only take about 1 minute) 


7. Once all of your balls are covered in chocolate, you can now decorate any way that you would like.  I chose the melt some red candy melts, and drizzle them over the balls.  **Melt them in a small bowl, then pour them into a ziplock bag and cut a small corner of the bag off to drizzle. 


I couldn't resist!! 
ENJOY!  They are fabulous if you ask me! I packaged them up and gave them to friends and colleagues.  They make wonderful gifts (because no one can figure out how they are made, nor do they look easy) so your friends will thank you! :) 

Monday, May 9, 2011

Simple Cake Pops - Red Velvet!

♥ Intermediate
Who doesn't love cake?  Who doesn't like suckers?  Well, now we can have both!!!

My sister actually gave me a recipe book for my birthday that were ALL Cake Pops.  I thought they were cool, and wanted to give them a try, and then forgot about them!  Until a few weekends ago when I was out with a very good friend, who insisted that I try one while we were out.  It was great, so I just had to make them.  Thank goodness my sister had given me that recipe book!

There are a MILLION ways to decorate these little guys, many of which are too cute for words, but for now I just tried something simple. And they were FABULOUS!!! I actually tried them off the stick (Cake Balls) first, and then put them on the stick on my second batch.  I preferred them off of the stick for myself, but on the stick they make great gifts.  I handed them out to a few of my favorite mothers at church on Mothers Day, and they were a big hit.

What you'll need: 

  • Red Velvet Cake Mix 
  • 3 Eggs
  • 1/3 C. Vegetable Oil
  • 1 1/3 C. Water
  • One container of Cream Cheese frosting
  • One bag of Wilton Candy Melts (Any color will work, I like the milk chocolate brown - NOTE: YOU CAN NOT MIX WITH FOOD COLORING TO CHANGE THE COLOR!!) 
  • One bag of lollipop sticks - they come in packs of 50 at your local Walmart or craft stores. Only needed if you make the suckers. 
  • Tall slender plastic bowl (Made for easier dipping)
  • 2 Cookie Sheets
  • Wax Paper 
  • Styrofoam Block (Only needed if you make the suckers) 

How it's done: 

1. Preheat your oven to 350*F (or whatever your box mix calls for). In large mixing bowl, combine your cake mix with your eggs, water, and oil.  (NOTE: Follow all measurements on your cake mix, my measurements are specific to Duncan Hines.)

2.  Grease a 9x13 inch pan, and pour in batter. Bake for approximately 30 minutes until toothpick comes out clean. Let the cake cool for 10 minutes, then remove from pan and let cool completely on a wire rack. (To speed up the process, I cut my cake into several pieces so that it will cool more quickly - I'm a cheater.)

3. Once your cake is completely cool, be sure to set aside a good amount of time for crumbling, rolling, and dipping.  This took me (on my first try) about two hours.  The cake balls are a little quicker than the cake pops, but it just depends on how quick you work.  Take each piece of your entire cake and crumble into a large mixing bowl.  Get the cake crumbles as fine as possible, no large chunks should be present.  I ended up carving off a tiny bit of the edge that was burnt on mine because it was too hard to crumble.

4. Once the cake is entirely crumbled, add 3/4 of the container of frosting to the cake crumbs and mix by hand.  (Literally, use your hands if necessary! ...they're going to get dirty anyway so don't be shy.)  Once the frosting is completely mixed in, your cake should be a pretty moist but firm dough.  It will be firm enough to hold it's shape, but not moist enough to be gooey.  Be careful not to add too much frosting, too much will make it impossible to roll and coat.

5.  Roll 1 1/2 inch balls by hand (or use a cookie dough scoop), and place onto a cookie sheet covered in wax paper. It can make roughly 48 cake balls.

6. Once all of the cake balls are rolled, place in the freezer for 15 minutes.  Don't freeze too long, if you do they will crack their candy coating once they defrost, you just want them cold enough to be firm while coating.

7. When your balls have about 5 minutes left in the freezer, start melting your candy melts.  If you're using Wilton brand, you'll microwave 1 minute, stir, 30 seconds, stir, 30 seconds, stir... and it should be done.  :)  Anything else, and you'll have to read the directions.  Make sure you use a tall thin bowl, so you can use as much as the coating as possible and make it easier to dip.

8. Remove your cake balls from the freezer.  Take each sucker stick and dip them into the candy coating about 1/2 inch.  Stick the covered end of stick into the cake balls.  By the time you stick them all, the first ones will be dry.  Take the first sucker you made, and dip it into the candy coating. Roll them gently over the edge until excess candy falls off, do not tap on edge!

9. Stick the sucker into the Styrofoam to dry!  (About 3 minutes, and your suckers are ready to eat!)  You can decorate even more if you have the time and energy too! Repeat until every sucker has been dipped completely.

*If you notice your suckers getting to soft to dip in the chocolate, you can re-freeze them for a few more minutes.

ENJOY!!  I wrapped them in suckers wrappers, tied with a bow, and added a name tag to describe the cake inside.  They made great treats for friends!