Wednesday, October 5, 2011

Pumpkin Cheesecake!

♥♥ Intermediate 


It's been nearly a month since the last time I posted on the blog, but I've had good reason. We just found out that we're expecting baby #2 (please, hold your applause and excitement). With that in mind, I'm sure you can figure out why I haven't been baking. (If you can't, I'm tired and I smell EVERYTHING... which really isn't great on your stomach if you're in the kitchen with fruity and spicy smells.) 


However, I'm determined to get back in the kitchen and continue to spread fabulous recipes to all the world. You're welcome. 


I decided to make a Pumpkin Cheesecake for family home evening this week, and it turned out really good. To be honest, I thought it would be so similar to a pumpkin pie that adding cream cheese wouldn't even matter, but it was very uniquely a cheesecake... and very, very, very tasty. If you're looking for a good pumpkin recipe, you should definitely try this one. And aside from the insane amount of cream cheese you'll need, it's a very short list of ingredients. This does take considerable time to make, so start late in the evening and sleep while it's cooling. Happy baking!  (I need to give some credit to Mrs. Martha Stewart too, because I stole this from her...) 


What you'll need: 
For the crust... 

  • 10 Whole Graham Crackers (crushed)
  • 1/4 Cup Granulated Sugar
  • 4 Tablespoons Unsalted Butter, melted
For the filling: 
  • 4 Packages (8 oz. bars) Cream Cheese, very soft
  • 1 1/4 Cup Granulated Sugar
  • 3 Tablespoons All-Purpose Flour
  • 1 Cup Canned Pumpkin Puree (I added WAYYYYY more than 1 Cup, but I probably should have left it at that.. ) 
  • 2 Tablespoons of Pumpkin Pie Spice
  • 1 Tablespoon of Vanilla Extract
  • 1/2 Teaspoon Salt
  • 4 Large Eggs, Room Temperature


How it's done: 

***To prevent the top from cracking, be careful not to overmix the batter, and do not open the oven door while the cake is baking or cooling inside the oven.


  1. Preheat oven to 350 degrees, with rack in center. Assemble a 9-inch nonstick springform pan, with the raised side of the bottom part facing up.
  2. Make the crust: In a medium bowl, mix cracker crumbs, sugar, and butter until moistened; press firmly into bottom of pan. Bake until golden around edges, 10 to 12 minutes. (I put the graham crackers, sugar, and butter in the food processor on pulse - and it was SOOOO easy!) 
  3. Make the filling: With an electric mixer, beat cream cheese and sugar on low speed until smooth; mix in flour (do not overmix). Add pumpkin puree, pie spice, vanilla, and salt; mix just until smooth. Add eggs one at a time, mixing until each is incorporated before adding the next.
  4. Place springform pan on a rimmed baking sheet. Pour filling into springform, and gently smooth top. Transfer to oven; reduce oven heat to 300 degrees. Bake 45 minutes. Turn off oven; let cheesecake stay in oven 2 hours more (without opening).
  5. Remove from oven; cool completely. Cover with plastic wrap; refrigerate until firm, at least 4 hours. Un-mold before serving.

I really loved this recipe, it was a great combination of the flavors that I have always loved, and the texture of cheesecake (and honestly, there is no better texture). Try it. You'll like it. 

Sunday, September 4, 2011

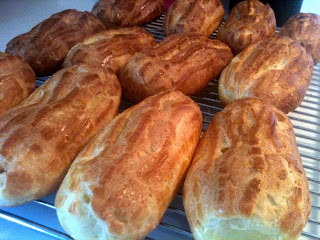
French Éclairs


♥♥♥ Advanced

If you've seen the Pate a Choux recipe, then you know where my inspiration for Éclairs came from. Aside from the fact that it's one of my absolute favorite desserts. My grandma makes them better than anyone (although, mine are prettier...ooooo!) and everyone requests hers when she's in town. However, these are a quick second, and are especially good when the pastry and chocolate are still warm. Seriously, try them warm with a cold Crème Patissiere... it will knock you off your feet. 

"I find it hard to disagree with the possibility that the height of luxury might not be an expensive car, a yacht in Monte Carlo, or a villa in Jamaica, but may instead be a really, really, really good chocolate eclair." -Andre K. Crump

What you'll need: 

Eclair Shells: 
* Pate A Choux Sucree (Cream Puff Dough) 
* 1 Egg, for the egg wash
* A pinch of Salt

Crème Patissiere
* 6 Egg Yolks
* 1/2 Cup Sugar
* 6 Tablespoons of Flour
* 2 Tablespoons Cornstarch
* 2 Cups of Milk
* 2 Tablespoons of Vanilla Extract

Chocolate Icing
* 10 oz. (1 1/4 Cup) Dark or Milk Chocolate 
* 3 Tablespoons Milk
* 4 Tablespoons Unsalted Butter, cut into small pieces
* 4 Tablespoons Sugar

How it's done: 

Éclair Shells: 
1. Preheat the oven to 400*F, and butter a baking sheet. 

2. Using a 1/2 Inch Nozzle, pipe 3-4 inch long logs of Pate a Choux Dough on the sheet. Allow adequate spacing! 

3. In a bowl, beat the egg and salt to form a glaze. Brush the top of each log with the glaze. Use the back of a fork dipped in the egg wash to score the top of each log. Drag prongs lightly across the top of the logs length, creating rows of shallow lines. 

4. Bake for 25-30 minutes, until light golden brown, and somewhat crisp, but not hard. Remove from oven and cool on a wire rack. 

Crème Patisseiere: 
1. In a bowl, whisk eggs and sugar together until they thicken and are pale yellow. Fold in the flour and cornstarch. 

2. In a saucepan, bring the milk to a low boil, then pour hot milk into the bowl of egg yolks. Stir well. Then pour mixture back into saucepan and heat to a boil. Lower heat and allow Crème to thicken, stirring regularly. When thickened, remove pan from heat, pour into a bowl and mix in vanilla extract. Cover the creme with parchment or saran wrap, which prevents a skin from forming on top, and chill to cool. 

Chocolate Icing: 
1. Slowly bring butter, sugar, and milk to a low boil in a saucepan, stirring continuously to make sure sugar dissolves. Add chocolate and remove from heat. Stir until chocolate has melted and icing is a smooth texture. Allow to cool some before using. 


To Assemble: 
1. Make a horizontal slice down the middle of the length of the Eclair shell. Pipe or spoon Creme Patissiere into the cavity of the Eclair shell. Top with the other half of the shell. Spoon the warm chocolate on top of the eclair, or dip the eclair into the frosting. 

Pâte à Choux Sucrée - Puff Pastry Dough

♥♥ Intermediate 

This past week, I took Ms. McKinley in to the Borders (5 days until they close for good!) to pick out some children's books on the cheap. Come to find out, the children's section was the first section to be raided by moms and teachers alike, as soon as the 'Everything must go!' sign went up in the window. However, there were still a few books left in the baking section - three of which I thought would make a great addition in cookbook collection. Sorry Kinley, we'll find you some books another day...

One of the books I picked up is called, Chocolate French. It's compiled by pastry chefs all over the world and focuses on the French influence on global cuisine. Totally up my alley. (The cover of the book shows some very tasty looking Eclairs, so I was sold on it instantly!)

The following pastry recipe is used in several different ways. It can be used to make cream puffs, eclairs, or profiteroles. It's the base to all great pastry treats!!!

Let's get baking.

What you'll need:

* 1 Cup of Flour
* 8 Tablespoons of Unsalted Butter
* 1/2 Cup of Water
* 1/2 Cup of Milk
* 5 Eggs
* 1 Tablespoon of Sugar

How it's done:

1. Place the butter in a saucepan with the water, milk, sugar, & salt. Stir, then bring slowly to a boil, allowing the butter to melt.

2. As son as the butter is melted, remove from the heat. Add all the flour into the liquid at once, then mix with a spoon until smooth.

3. Return to heat and continue to stir. Remove from heat when dough no longer sticks to the side of the pan. Transfer to a bowl and let mixture cool slightly.  (I let it cool for 5 minutes in a stainless steel bowl.)

4. Add the eggs one at a time, mixing each thoroughly until totally absorbed into the dough. The chox dough should be smooth, shiny, and thick. Stir it a bit more with the spatula to add air to the door and to lighten its texture.

5. Set the choux dough aside for use in profiteroles, eclairs, or cream puffs.

Yields approximately 20 large choux! 


Thursday, September 1, 2011

Chocolate & Peanut Butter No-Bake Cookies

♥ Beginner

These are great to make around our house because even though we may be on the low side of groceries, we ALWAYS have the ingredients for no-bake cookies. I'm willing to bet that your home usually does too. I actually forget about no-bake cookies until my loving husband decides to make them. (This is sort of his thing in the kitchen!)

He got frustrated yesterday when he started pulling things out of the cabinet, determined to make something sweet for our family (thinking he could surprise me), when I asked "Whatcha makin'? No-Bake's?" His reply was an exasperated "How did you know?!"  - - I know everything. He should know that by now. 

If you don't love these little nuggets, there's something seriously wrong with you...

What you'll need: 

* 8 Tablespoons of Butter
* 1/2 Cup of Milk
* 2 Cups of Sugar
* 1 Cup Semi-Sweet Chocolate Chips
* 4 Tablespoons of Peanut Butter
* 3 Cups of Oatmeal (Rolled or Quick Oats)
* 1 Teaspoon of Vanilla

How it's done: 

1. Combine the Butter, Milk, & Sugar in a medium saucepan. Bring to a full rolling boil and boil for 1 minute. 

2. Remove mixture from heat, and stir in chocolate chips, peanut butter, & vanilla. Once fully melted, pour mixture over oats. Work quickly!  

3. Once combined, drop by the spoonful onto waxed paper and let cool & harden. 

You'll need to make about 4 batches of them, because they disappear SOOOOOO quickly!!

*Pictures are from www.browneyedbaker.com - Check her out, she's amazing too! 

Classic Baked Mac & Cheese

♥ Beginner

Who doesn't love Mac n' Cheese? Maybe it's that I spent a good portion of my formative years in the south and midwest, or maybe it's just such a good comfort food, but we almost always have a baked mac n' cheese in the fridge.

Some mac n' cheese recipes call for some ingredients that might have you scratching your head. For me however, I like the classics. It should just be noodles and cheese! Here you'll find a classic recipe for a wonderful baked mac n' cheese.

What you'll need: 

*16 oz. Package of Noodles (I like to use cavapatti)
* 4 Tablespoons of Butter
* 4 Cups of Milk
* 4 Tablespoons of Flour
* 4 Cups of grated Extra Sharp Cheddar Cheese (You can use Sharp or just regular Cheddar Cheese
* Salt & Pepper to taste
* Panko Bread Crumbs

How it's done:

1. Prepare pasta according to directions on box.

2.  Preheat oven to 400*F.

3. In a large saucepan heat milk & butter to boiling and then turn down to medium & whisk in the flour. Make sure to whisk until it's completely combined so you don't get chunks of flour. Whisk for 5 minutes or until mixture begins to get thick.

4. Remove the milk mixture from the heat and add in half of the cheese. Stir until completely melted.

5. Drain pasta and put them in a pyrex baking dish, and pour cheese the over the pasta evenly. Top with bread crumbs.

6. Bake for 20 minutes, or until the top starts to brown. Let it set for 10 minutes before serving.

Enjoy... I know we have! :)

Monday, August 29, 2011

Oatmeal Raisin Cookies

♥ Beginner 

My Dad's all time favorite cookies are Oatmeal Rasin. I think he can smell them from five miles away. Not to mention, they are still a lot healthier of a cookie than most (cough, cough, chocolate chip...)

What you'll need: 

3/4 Cup Butter, Softened
1 Cup packed Brown Sugar
1/2 Cup Granulated Sugar
1 Teaspoon Baking Powder
1/4 Teaspoon Baking Soda
1/2 Teaspoon Ground Cinnamon
2 Eggs
1 Teaspoon Vanilla
1 3/4 Cups All-Purpose Flour
2 Cups Rolled Oats
1 Cup Raisins

How it's done: 

1. Preheat your oven to 375*F.

2. In a large mixing bowl combine butter and brown sugar, granulated sugar, baking powder, baking soda, and cinnamon.

3. Beat in eggs and vanilla until combined.

4. Mix in Flour until combined, and hand stir in raisins.

5. Drop by tablespoon full onto non-stick cookie sheet (2 inches apart), and flatten with palm of hand. Bake for 8-10 minutes or until edges are golden brown. Cool on a wire rack.

Enjoy!

Classic Chocolate Chip Cookies

♥ Beginner 


When it dawned on me that I didn't have a classic chocolate chip cookie recipe here on the blog, I knew I had to post one right away. I'm sure most everyone has a favorite chocolate chip cookie recipe, but for me it holds a special place in my heart. I can remember my mom baking cookies in the kitchen when I was just old enough to help her scoop dough onto the cookie sheet. My sister and I had so much fun scooping those lopsided little cookies. I imagine that most people have memories like that in the kitchen. 

This recipe is actually straight out of the Better Homes & Gardens Cookbook, it's the very recipe my own mom has used for years... well, until she discovered the Toll House scoop and bake cookie dough that is...

What you'll need: 

1/2 Cup Shortening
1/2 Cup Butter
1 Cup packed Brown Sugar
1/2 Cup Granulated Sugar
1/2 Teaspoon Baking Soda
1/4 Teaspoon Salt
2 Eggs
1 Teaspoon Vanilla
2 1/2 Cups of All-Purpose Flour
2 Cups Chocolate Chips

How it's done: 

1. Preheat oven to 375*F. 

2. It's very important that your butter is room temperature or your cookies could go flat! Beat in large mixing bowl butter and shortening on high speen for 30 seconds. Add brown sugar, granulated sugar, baking soda, and salt and mix until combined. 

3. Beat in eggs & vanilla until combined (Note: Over-beating your eggs can make your cookies go flat as well, only beat until things are combined from here on out - or hand mix!) 

4. Add in flour and mix until combined.

5. Hand mix chocolate chips into batter. 


6. Drop by the tablespoon onto your non-stick cookie sheet two inches apart. Bake for 8-10 minutes, until edges are brown. Cool on wire rack. 

Tuesday, August 9, 2011

Congratulations!

And the winner is: 

Heilit & Matthew Biehl!

Congratulations! You'll love the recipe book and utensils! 


Stay tuned for more drawings in the future! 

Friday, August 5, 2011

ENTER TO WIN!!!!

Giveaway!

With almost 45 recipes added to the blog, I think it's about time for a drawing... don't you?  It's time to appreciate my followers! Let's give away some free stuff, and see if we can share some great recipe ideas at the same time!  Winner will receive:


Cupcakes & Muffins 100 Everyday Recipes by LoveFood ! 

&
Piggy Wiggy little whisk, silicone spatula, and nylon turner! 
*You can find more fun kitchen utensils like these here!

"This little piggy gets the job done." I LOVE these Piggy Wiggy utensils! They are so fun to use, and the whisk is wonderfully heavy in the handle which is perfectly comfortable in your hand. Once you try them, you'll love them! 

All you have to do is click on the blue button that says, "Join this site" in the right sidebar, and log in.

Example!
Once you've become a member, add a comment to this post sharing what your absolute favorite snack is!


It's almost too easy!!! 


You have through Monday to enter! Enter Now! Drawing will be held on Tuesday
Monday, August 8th, 2011 - Last day to enter!

Wednesday, July 27, 2011

Chinese Plum Salad Dressing

Beginner 


In the hunt to make the best Chinese Chicken Salad ever, I knew I would have to make my own dressing. Especially since there were no dressings at the store labeled "Chinese Plum". I found a recipe, and tried it out. With a few tweaks to the recipe, it was just how I like it! I'm sure you'll love it too.


What you'll need: 

  • 2 oz. chunk of Ginger Root (or I used 2 Tablespoons, add more to taste) 
  • 1/3 Cup Sugar
  • 1/3 Cup Rice Vinegar
  • 1 Tablespoon + 1 Teaspoon Sesame Oil
  • 1 Tablespoon Soy Sauce
  • 1 Tablespoon Plum Sauce
  • 2 Tablespoons Water
  • Pinch of White Pepper
  • 2 Tablespoons crushed Peanuts

How it's done: 

1. You can use a Braun mixer, or food processor. I used the food processor so I didn't have to chop the ginger finely by hand. Which ever way you chose, peel and grind the ginger root finely.

2. Combine the vinegar and sugar in a small pot and bring to a boil, uncovered. Boil for one minute. Add the ginger and boil for one more minute. Take off the heat and pour into the food processor.

2. In the processor, mix all of the ingredients until combined. You should have about 3/4 of a cup.

This dressing is perfect for most types of salads, as well as dipping sauce. We used it for chicken finger dip today and it was great!

Chinese Chicken Salad

Beginner
I'm one of those people who always orders the exact same thing off of the menu, every time we frequent the same restaurant. It may be a surprise to you, but I don't like change, especially with my food. I always get the Black & Bleu Salad at O'Charleys, the California Club at Ruby Tuesday's, The Button Sandwich at Best Bet, and the Chinese Chicken Salad at P.F. Changs... well, I used to, until recently when they took it off the menu. :(  I should say they took it off the menu a year and a half ago, but it's still bothering me deep in my soul. We don't even eat there anymore because that would mean I would have to find a new menu item! Gasp!

I once found a similar salad (with the same name) across the street at The Cheesecake Factory, but it still isn't the same. SO, with that said, I've come up with my own (or stolen parts of others and pieced them together).  If you're a connoisseur of Chinese Chicken Salad, like me, hopefully this will meet your needs. I know it did mine! 


What you'll need:
  • 1 Head of Iceberg Lettuce (or lettuce of choice) 
  • 2 Chicken Breasts
  • 1 Bottle of Teriyaki Sauce
  • Crispy Fried Wonton Strips (or those chinese noodle things you buy in a can) 
  • 2 Tablespoons of crushed peanuts
  • 1 Can of Mandarin Oranges (or the fresh mandarin oranges if they are in season) 
  • Chinese Plum Salad Dressing (Click for recipe) 
How it's done: 

1. Prepare your head of lettuce by washing and chopping into bite size pieces. 

2. Broil the chicken breasts, and in the last few minutes brush on the teriyaki sauce. Once it's completely cooked, chop it into small bite size cubes. Place a one cup of chicken on top of the bed of lettuce. 

3. Top with mandarin oranges, crushed peanuts, and wonton strips. Dress with plum dressing, and enjoy! 

***This is one of my favorite salads yet, it's pretty easy to make and can be prepared and left unassembled in the fridge for a few days. It makes for some great lunches! 

Cheese Stuffed Mushrooms... Mouth Watering!

Beginner 


We've been trying a lot of new foods around our house lately. Mostly because we're desperate for something other than spaghetti and chicken parmesan (poor people food) which we eat on more of a regular basis than I would like to admit. We've started digging into our minds, and the take-out menus of our favorite restaurants, for a little more inspiration of some good food that's easy (and cheap, did I mention that) to have around the house! 

Let me preface this by saying that I NEVER eat mushrooms, so this was a huge leap for me. As an example, I will pick out every single mushroom in chicken piccata... just because they are mushrooms. I think I might have turned a corner this week with these little guys, because I'm starting to think a little differently about mushrooms. (I just try to force myself to look at them as something other than fungus. Nice visual, huh?) 

Before you get started on these, just remember that these are totally adaptable to your tastes. To make them a little more rich add chopped crab meat, for a little tang, add a little lemon juice... you get the idea. However, we thought they were perfect just the way they are. 


What you'll need: 
  • 12 Whole Fresh Mushrooms - I used stuffing mushrooms from Meijer. 
  • 1 Tablespoon Extra Virgin Olive Oil
  • 3 Cloves of Minced Garlic
  • 1 8 oz. Package of Cream Cheese
  • 1/4 Cup Grated Parmesan Cheese - I prefer to use a block, because the pre-grated stuff doesn't melt as well. 
  • 1/4 Teaspoon Black Ground Pepper
  • 1/4 Teaspoon Onion Powder
  • 1/4 Teaspoon Cayenne Pepper (Optional - I did NOT use) 
  • 1/4 Cup Italian Bread Crumbs or Panko

How it's done:

1. Preheat your oven to 350*F. Spray a baking sheet with non-stick cooking spray and set aside. 

2. After cleaning the mushrooms with a damp paper towel, carefully break off the stems.  Chop the stems into tiny pieces (or use a food processor like I did!) Mince garlic and add to the mushroom stems.   

3. Heat the oil in a large skillet on medium heat. Add garlic and chopped mushrooms to the skillet, and fry until all moisture is gone. Be careful not to burn the garlic. Once finished, set it aside to cool. 

4. In your food processor (or large bowl with mixer) combine cream cheese, parmesan cheese, pepper, onion powder, and cayenne. 

5. Once the mushrooms and garlic have cooled completely, add them to the cream cheese mixture and combine well.  The mixture should be thick! 

6. Pipe the cream cheese mixture into the mushroom caps, filling them generously. Top them with a sprinkle of italian bread crumbs or panko. (I used bread crumbs, but wished I had used Panko, the flavor of the panko is richer and crispier than the bread crumbs.) 

7. Place the mushrooms on the greased cookie sheet and bake for approximately 20 minutes. When the tops start to brown, and a puddle of water begins to form under the mushroom, they are done. 

8. EAT AND ENJOY!!! :):):):):)

Just for the record, all of mine did not turn out perfectly. If they lean just the slightest bit in the oven, the cheese had a tendency to spill out.  That's okay though, they still tasted wonderful!!! 

Monday, July 18, 2011

Baked Mac n' Cheese

♥♥ Intermediate

There really is no better comfort food than Mac n' Cheese.  Especially here in the midwest, where mac n' cheese is on every menu. This mac n' cheese recipe is even better than the normal because it's baked... and has a crispy crust on top. MMMMmmmmm, excuse me while I eat some for breakfast....

My husband, Jared, is the one who is submitting this recipe to the blog. He's the one who decided to make it, and share it with all of you, so direct your thanks to him. :)

What you'll need: 

  • 6 Cups (uncooked) Elbow Macaroni Noodles (or another shape!)
  • 3 Cups Shredded Sharp Cheddar Cheese
  • 1/2 Cup Grated Parmesan Cheese
  • 2 Cups Whole Milk (Vitamin D) 
  • 1/2 Teaspoon Worcestershire Sauce
  • 1 Teaspoon Dijon Mustard
  • 1 1/2 Cups Crushed Corn Flakes
  • 5 Tablespoons Melted Butter
  • 1/2 Lb. of White American Cheese

How it's done: 

1. Preheat over to 350*F.

2. In a large saucepan heat milk until simmering.

3. While waiting for the milk to bubble, fill a medium saucepan with water and boil the noodles. I suggest making them al dente since you'll be baking them as well.

4. Once milk begins to bubble, add in the cheese and stir constantly. Once the cheese is completely melted, remove from the heat continuing to stir (if you would like it a little thicker, add a Tablespoon of Flour).

5. Once the cheese mixture has cooled some, add the Worcestershire sauce, mustard, and pepper to taste.  Mix thoroughly!

6. After straining your pasta, gently fold your cheese mixture into the noodles.  Once completely combined, pour the noodle mixture into a greased pyrex dish.

7. Combine crushed corn flakes and butter in ziplock bag, and pour on top of mac n' cheese.

8. Bake for 30 minutes!

Enjoy!!!

Wednesday, July 13, 2011

Cream Cheese Crepes with Blueberry Compote

♥♥♥ Advanced

I can remember being nine years old the first time I ever tried a crepe. It was a cream cheese crepe with a strawberry syrup on top, topped off with whipped cream.  I can remember thinking that I would never eat pancakes ever again as long as I lived. To my dismay, many breakfast restaurants don't offer cream cheese crepes for breakfast. I've spent many years searching for a breakfast place close to home that serve my favorite dish, and while I've found a few, they just aren't ever as good as I remember.

I hadn't really considered making them until the other night when I was watching some show on Food Network (one of the ten shows that Bobby Flay is in) and Bobby Flay suggested that very few people could make a "perfect crepe" because they are so temperamental.  Well Bobby Flay, I'm here to say you're wrong. A crepe doesn't have to be perfect!  It doesn't have to be perfectly browned, or even the same exact size as the others on the plate... it just has to taste good. So, I dedicate this post to Bobby Flay, someone I generally admire (even when he's wrong).
I'll be posting a fruit compote recipe here, because it's a good recipe to have all by itself.  You can use nearly any fruit, and can use them in so many ways. I prefer breakfasts, and over ice cream, but you can use them nearly everywhere.


What you'll need:


For the Crepes - 
1 Cup Flour
1 1/2 Cup Milk
2 Eggs
1/2 Cup Sugar
1 Teaspoon Salt
1 Tablespoon Oil (I used vegetable oil)

For the Filling-
8 oz. Cream Cheese (One bar)
2/3 Cups of Powdered Sugar
1/2 Teaspoons of Vanilla
1/2 Teaspoon Lemon Zest - or Lemon Juice

How it's done: 

1. Beat your eggs in a large bowl. Add in the flour, milk, sugar, salt, and oil. Blend until combined.  I just left the mixer (with whisk attachment) on while I went and mixed up my filling.

2. In medium size bowl, blend cream cheese, powdered sugar, vanilla, and lemon juice. Mix until combined and creamy. Set aside.

3. Begin making your blueberry compote (Or any fruit compote!).

4. Heat a 6-8 inch skillet with 1 teaspoon oil over medium-high heat. Once heated, remove the pan from the heat, drop in 2-3 Tablespoons of crepe batter.  Tilt the pan in circles to cover entire base of pan, and return to heat. Leave the crepe to cook for 45 seconds to 1 minute. Use a spatula to turn it over, and cook  for 30 more seconds.

5. Once removed from the pan, put your crepe on a plate covered with paper towel.  Your crepe will expire some so your paper towel might be wet when you're all done.  That's okay, the heat and expiration make your crepes really nice and soft, which makes them easy to roll!

6. After all of your crepes have been cooked, you can start to fill them and roll them up! (Roll the pretty side of the crepe outward of course!) I had 6 in. crepes, and i filled with three tablespoons of cream cheese mixture, but you can use as much or as little as you would like.


7. Top with your fruit compote and you're done! It's as simple as that, and they taste fantastic!

Enjoy!