Wednesday, July 27, 2011

Chinese Plum Salad Dressing

Beginner 


In the hunt to make the best Chinese Chicken Salad ever, I knew I would have to make my own dressing. Especially since there were no dressings at the store labeled "Chinese Plum". I found a recipe, and tried it out. With a few tweaks to the recipe, it was just how I like it! I'm sure you'll love it too.


What you'll need: 

  • 2 oz. chunk of Ginger Root (or I used 2 Tablespoons, add more to taste) 
  • 1/3 Cup Sugar
  • 1/3 Cup Rice Vinegar
  • 1 Tablespoon + 1 Teaspoon Sesame Oil
  • 1 Tablespoon Soy Sauce
  • 1 Tablespoon Plum Sauce
  • 2 Tablespoons Water
  • Pinch of White Pepper
  • 2 Tablespoons crushed Peanuts

How it's done: 

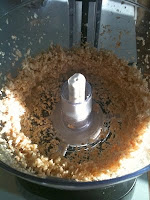
1. You can use a Braun mixer, or food processor. I used the food processor so I didn't have to chop the ginger finely by hand. Which ever way you chose, peel and grind the ginger root finely.

2. Combine the vinegar and sugar in a small pot and bring to a boil, uncovered. Boil for one minute. Add the ginger and boil for one more minute. Take off the heat and pour into the food processor.

2. In the processor, mix all of the ingredients until combined. You should have about 3/4 of a cup.

This dressing is perfect for most types of salads, as well as dipping sauce. We used it for chicken finger dip today and it was great!

Chinese Chicken Salad

Beginner
I'm one of those people who always orders the exact same thing off of the menu, every time we frequent the same restaurant. It may be a surprise to you, but I don't like change, especially with my food. I always get the Black & Bleu Salad at O'Charleys, the California Club at Ruby Tuesday's, The Button Sandwich at Best Bet, and the Chinese Chicken Salad at P.F. Changs... well, I used to, until recently when they took it off the menu. :(  I should say they took it off the menu a year and a half ago, but it's still bothering me deep in my soul. We don't even eat there anymore because that would mean I would have to find a new menu item! Gasp!

I once found a similar salad (with the same name) across the street at The Cheesecake Factory, but it still isn't the same. SO, with that said, I've come up with my own (or stolen parts of others and pieced them together).  If you're a connoisseur of Chinese Chicken Salad, like me, hopefully this will meet your needs. I know it did mine! 


What you'll need:
  • 1 Head of Iceberg Lettuce (or lettuce of choice) 
  • 2 Chicken Breasts
  • 1 Bottle of Teriyaki Sauce
  • Crispy Fried Wonton Strips (or those chinese noodle things you buy in a can) 
  • 2 Tablespoons of crushed peanuts
  • 1 Can of Mandarin Oranges (or the fresh mandarin oranges if they are in season) 
  • Chinese Plum Salad Dressing (Click for recipe) 
How it's done: 

1. Prepare your head of lettuce by washing and chopping into bite size pieces. 

2. Broil the chicken breasts, and in the last few minutes brush on the teriyaki sauce. Once it's completely cooked, chop it into small bite size cubes. Place a one cup of chicken on top of the bed of lettuce. 

3. Top with mandarin oranges, crushed peanuts, and wonton strips. Dress with plum dressing, and enjoy! 

***This is one of my favorite salads yet, it's pretty easy to make and can be prepared and left unassembled in the fridge for a few days. It makes for some great lunches! 

Cheese Stuffed Mushrooms... Mouth Watering!

Beginner 


We've been trying a lot of new foods around our house lately. Mostly because we're desperate for something other than spaghetti and chicken parmesan (poor people food) which we eat on more of a regular basis than I would like to admit. We've started digging into our minds, and the take-out menus of our favorite restaurants, for a little more inspiration of some good food that's easy (and cheap, did I mention that) to have around the house! 

Let me preface this by saying that I NEVER eat mushrooms, so this was a huge leap for me. As an example, I will pick out every single mushroom in chicken piccata... just because they are mushrooms. I think I might have turned a corner this week with these little guys, because I'm starting to think a little differently about mushrooms. (I just try to force myself to look at them as something other than fungus. Nice visual, huh?) 

Before you get started on these, just remember that these are totally adaptable to your tastes. To make them a little more rich add chopped crab meat, for a little tang, add a little lemon juice... you get the idea. However, we thought they were perfect just the way they are. 


What you'll need: 
  • 12 Whole Fresh Mushrooms - I used stuffing mushrooms from Meijer. 
  • 1 Tablespoon Extra Virgin Olive Oil
  • 3 Cloves of Minced Garlic
  • 1 8 oz. Package of Cream Cheese
  • 1/4 Cup Grated Parmesan Cheese - I prefer to use a block, because the pre-grated stuff doesn't melt as well. 
  • 1/4 Teaspoon Black Ground Pepper
  • 1/4 Teaspoon Onion Powder
  • 1/4 Teaspoon Cayenne Pepper (Optional - I did NOT use) 
  • 1/4 Cup Italian Bread Crumbs or Panko

How it's done:

1. Preheat your oven to 350*F. Spray a baking sheet with non-stick cooking spray and set aside. 

2. After cleaning the mushrooms with a damp paper towel, carefully break off the stems.  Chop the stems into tiny pieces (or use a food processor like I did!) Mince garlic and add to the mushroom stems.   

3. Heat the oil in a large skillet on medium heat. Add garlic and chopped mushrooms to the skillet, and fry until all moisture is gone. Be careful not to burn the garlic. Once finished, set it aside to cool. 

4. In your food processor (or large bowl with mixer) combine cream cheese, parmesan cheese, pepper, onion powder, and cayenne. 

5. Once the mushrooms and garlic have cooled completely, add them to the cream cheese mixture and combine well.  The mixture should be thick! 

6. Pipe the cream cheese mixture into the mushroom caps, filling them generously. Top them with a sprinkle of italian bread crumbs or panko. (I used bread crumbs, but wished I had used Panko, the flavor of the panko is richer and crispier than the bread crumbs.) 

7. Place the mushrooms on the greased cookie sheet and bake for approximately 20 minutes. When the tops start to brown, and a puddle of water begins to form under the mushroom, they are done. 

8. EAT AND ENJOY!!! :):):):):)

Just for the record, all of mine did not turn out perfectly. If they lean just the slightest bit in the oven, the cheese had a tendency to spill out.  That's okay though, they still tasted wonderful!!! 

Monday, July 18, 2011

Baked Mac n' Cheese

♥♥ Intermediate

There really is no better comfort food than Mac n' Cheese.  Especially here in the midwest, where mac n' cheese is on every menu. This mac n' cheese recipe is even better than the normal because it's baked... and has a crispy crust on top. MMMMmmmmm, excuse me while I eat some for breakfast....

My husband, Jared, is the one who is submitting this recipe to the blog. He's the one who decided to make it, and share it with all of you, so direct your thanks to him. :)

What you'll need: 

  • 6 Cups (uncooked) Elbow Macaroni Noodles (or another shape!)
  • 3 Cups Shredded Sharp Cheddar Cheese
  • 1/2 Cup Grated Parmesan Cheese
  • 2 Cups Whole Milk (Vitamin D) 
  • 1/2 Teaspoon Worcestershire Sauce
  • 1 Teaspoon Dijon Mustard
  • 1 1/2 Cups Crushed Corn Flakes
  • 5 Tablespoons Melted Butter
  • 1/2 Lb. of White American Cheese

How it's done: 

1. Preheat over to 350*F.

2. In a large saucepan heat milk until simmering.

3. While waiting for the milk to bubble, fill a medium saucepan with water and boil the noodles. I suggest making them al dente since you'll be baking them as well.

4. Once milk begins to bubble, add in the cheese and stir constantly. Once the cheese is completely melted, remove from the heat continuing to stir (if you would like it a little thicker, add a Tablespoon of Flour).

5. Once the cheese mixture has cooled some, add the Worcestershire sauce, mustard, and pepper to taste.  Mix thoroughly!

6. After straining your pasta, gently fold your cheese mixture into the noodles.  Once completely combined, pour the noodle mixture into a greased pyrex dish.

7. Combine crushed corn flakes and butter in ziplock bag, and pour on top of mac n' cheese.

8. Bake for 30 minutes!

Enjoy!!!

Wednesday, July 13, 2011

Cream Cheese Crepes with Blueberry Compote

♥♥♥ Advanced

I can remember being nine years old the first time I ever tried a crepe. It was a cream cheese crepe with a strawberry syrup on top, topped off with whipped cream.  I can remember thinking that I would never eat pancakes ever again as long as I lived. To my dismay, many breakfast restaurants don't offer cream cheese crepes for breakfast. I've spent many years searching for a breakfast place close to home that serve my favorite dish, and while I've found a few, they just aren't ever as good as I remember.

I hadn't really considered making them until the other night when I was watching some show on Food Network (one of the ten shows that Bobby Flay is in) and Bobby Flay suggested that very few people could make a "perfect crepe" because they are so temperamental.  Well Bobby Flay, I'm here to say you're wrong. A crepe doesn't have to be perfect!  It doesn't have to be perfectly browned, or even the same exact size as the others on the plate... it just has to taste good. So, I dedicate this post to Bobby Flay, someone I generally admire (even when he's wrong).

I'll be posting a fruit compote recipe here, because it's a good recipe to have all by itself.  You can use nearly any fruit, and can use them in so many ways. I prefer breakfasts, and over ice cream, but you can use them nearly everywhere.


What you'll need:


For the Crepes - 
1 Cup Flour
1 1/2 Cup Milk
2 Eggs
1/2 Cup Sugar
1 Teaspoon Salt
1 Tablespoon Oil (I used vegetable oil)

For the Filling-
8 oz. Cream Cheese (One bar)
2/3 Cups of Powdered Sugar
1/2 Teaspoons of Vanilla
1/2 Teaspoon Lemon Zest - or Lemon Juice

How it's done: 

1. Beat your eggs in a large bowl. Add in the flour, milk, sugar, salt, and oil. Blend until combined.  I just left the mixer (with whisk attachment) on while I went and mixed up my filling.

2. In medium size bowl, blend cream cheese, powdered sugar, vanilla, and lemon juice. Mix until combined and creamy. Set aside.

3. Begin making your blueberry compote (Or any fruit compote!).

4. Heat a 6-8 inch skillet with 1 teaspoon oil over medium-high heat. Once heated, remove the pan from the heat, drop in 2-3 Tablespoons of crepe batter.  Tilt the pan in circles to cover entire base of pan, and return to heat. Leave the crepe to cook for 45 seconds to 1 minute. Use a spatula to turn it over, and cook  for 30 more seconds.

5. Once removed from the pan, put your crepe on a plate covered with paper towel.  Your crepe will expire some so your paper towel might be wet when you're all done.  That's okay, the heat and expiration make your crepes really nice and soft, which makes them easy to roll!

6. After all of your crepes have been cooked, you can start to fill them and roll them up! (Roll the pretty side of the crepe outward of course!) I had 6 in. crepes, and i filled with three tablespoons of cream cheese mixture, but you can use as much or as little as you would like.


7. Top with your fruit compote and you're done! It's as simple as that, and they taste fantastic!

Enjoy!

Fruit Compote

Beginner
A basic fruit compote is a great accessory to many dishes. It's great on top of other fruit, ice cream, crepes, pie, torte, cheesecake, etc. As the example today, I'll be using blueberries (to accompany some Cream Cheese Crepes) but you can use virtually any fruit. Some of the best compotes are Strawberry, Peach, Nectarine, Plum, Raspberry, Blueberry, Rhubarb.... and the list goes on and on.

What you'll need:

2 Cups of fresh or frozen Blueberries
3 Tablespoons of Water
1/2 Cup of Sugar
2 Teaspoons Lemon Juice (Adjust lemon juice depending on fruit used)

How it's done:

1. Combine 1 Cup of the blueberries, water, sugar, and lemon juice in a small sauce pan over medium heat. Cook for about 10 minutes.

2. Add the rest of the blueberries and cook for 8 more minutes, stirring frequently.

3. Serve warm over dish!

Friday, July 1, 2011

Strawberry Rhubarb Ice Cream

♥♥♥ Advanced
I sort of had one of those "AH-HA!" moments a few days ago, where I imagined combining a few of my favorite summer things into one treat.

Strawberry + Rhubarb + Ice Cream = WINNER!

Who doesn't love Strawberry Rhubarb anyway, but combined with ice cream and you'll never want plain strawberry ice cream ever again.  I promise.  I tasted it for the very first time this morning for breakfast... and I might even have to "taste" it again for lunch!

Trust me when I say, if you make it once you'll probably make it a few more times this summer!

*Just a note: You can make this without an ice cream maker, but it's a lot more work.  I don't own one, but my sister was kind enough to let me borrow hers (Thanks Ash!) so it made the process a lot more fun! Now I might have to go buy one! 

What you'll need:

(The measurements may need to be adjusted to fit your ice cream maker, the one I used was 1.5 Pint maker)

  • 3 Cups of Chopped Rhubarb (1 Inch pieces or smaller) 
  • 2 Cups of Strawberries - Hulled and quartered
  • 1 Cup of Whole Milk
  • 4 Teaspoons of Corn Starch
  • 1 1/4 Cups of Heavy Cream
  • 2/3 Cup of Sugar (For the Ice Cream Base
  • 1/2 Cup of Sugar (For the Strawberry & Rhubarb) 
  • 1 Teaspoon Vanilla Extract
  • 2 oz. of Cream Cheese
  • 1/8 Teaspoons of Salt

Boiling the rhubarb.
How it's done: 

1. Wash and prepare rhubarb and strawberries.

2. Bring 1/2 Cup of Sugar & rhubarb to a boil over medium-low heat in a saucepan. Once boiling, add strawberries to the mixture and bring to a boil again. Turn off the heat. The goal is not to make jam, but it's okay if it gets a little thick. Allow this to cool a bit while you make the ice cream base.

After adding the strawberries. 
3. Mix well in a small container 2 Tablespoons of Milk and Corn Starch. Set Aside.

4. In a medium saucepan, over medium heat, bring the milk, cream, and remaining sugar to a boil. Turn off the heat and add the cornstarch mixture, whisking continuously. Turn the heat on low and whisk until the mixture gets thick and coats the back of a spoon. You should be able to see a trail when you drag your spoon through it.

Melting the cream cheese. 
5. Put the strawberry rhubarb mixture through a strainer. Discard the chunky pieces, and fold 1 1/2 Cups of the saucy mixture into the Ice Cream base.

6. Once the ice cream base and strawberry rhubarb are mixed well, add the vanilla, salt, and cream cheese. Whisk the mixture until the cream cheese is melted. Remove from heat and allow to cool for a few minutes.

7. Pour the ice cream into a refrigerator safe bowl, and stick in the freezer for 5 minutes. After 5 minutes, stir the mixture and return to the freezer for 5 more minutes. Do this for 25 minutes total. After the 25 minutes, double check that it is completely cold and if it is throw it in your ice cream maker (following the makers directions!).

8. Wait for your maker to churn your ice cream! When it's all done, put it in an air tight container and move it to the freezer!

ENJOY!

Pluot & Cream Cheese Tart

Beginner
Do you have any idea what a Pluot is? I didn't. It showed up in my Green B.E.A.N. Delivery this week, and honestly I was a little scared of it.  So, I googled it.

A Pluot is a hybrid fruit of a Plum and an Apricot. They are sweet and sour all at once, and honestly if you love plums then you'll love the Pluot. I went to slice them for this tart, and once I tasted them I couldn't stop eating them. They are pretty tasty for being a fruit I had never heard of before! And their color is beautiful too, once you cut into them you just have to taste it.

What you'll need:

  • 3-4 Pluots
  • 1 Sheet of Puff Pastry
  • 8 oz. of Cream Cheese
  • 1 Cup Sugar
  • 2 Eggs

How it's done:

1. Preheat oven to 375*F.

2. After defrosting your puff pastry, cut off 1/3 of the sheet making it a rectangle. Place on baking sheet. Slice all of your Pluots into thin slices.

3. Combine in mixing bowl the Cream Cheese, ONE Egg, and 1/2 Cup Sugar until well blended.

4. Spread the cream cheese mixture onto the puff pastry, leaving a one inch border all the way around.

5. Lay all of your Pluot Slices on top of the cream cheese, layering as lightly or heavily as you would like.


6. Fold up the sides of the puff pastry, and pinch the corners to keep it closed. Take the other egg, and beat lightly and brush onto the tart. Sprinkle with remaining sugar.

7. Put into the oven for 30-40 Minutes or until puff pastry is golden brown.

Enjoy! (This is great for breakfast or dessert!)

Cinnamon Roll Muffins

♥♥ Intermediate

It's been far to long since the last post... but weren't those enchiladas scrumptious? I'm still dreaming about them. In fact, I might make more today.

However, these are the perfect dessert to those enchiladas - or the perfect breakfast for a nice Sunday Morning! (But they really should be eaten as soon as they come out of the oven, because they are soooo good warm.) By the way, I totally stole this recipe from my friend Kate over at A Dash of Sass. She has two cinnamon roll muffin recipes, but this is the one I like so I adapted it to my tastes.  Thanks for your help Kate!

Mixing in Flour
What you'll need:

  • 1 Cup Buttermilk (or 1 Cup Milk with 1 Tablespoon Lemon Juice) 
  • 1/2 Cup Brown Sugar (I even added more, because I'm a sugar addict) 
  • 1 Teaspoon Baking Soda
  • 1/2 Teaspoon Salt
  • 1/2 Teaspoon Vanilla
  • 1 Egg
  • 3 Cups - 3 1/2 Cups Flour
  • Icing (I used a cream cheese frosting - yumm!!!) 
Filling- 
  • 4 Tablespoons Butter, room temperature
  • 1 Cup Brown Sugar 
  • Not exactly a rectangle... 
  • 1 Teaspoon Cinnamon

How it's done:

1. Combine the Milk, Brown Sugar, Baking Soda, Salt, Vanilla, and Egg in a mixing bowl.  Slowly add the Flour until combined.

2. Turn the dough out onto a lightly floured surface, and knead for a minute or two.

3. Roll the dough into a 12 x 24 Inch rectangle. Spread the butter on top, and sprinkle with the Brown Sugar and Cinnamon.

4. Roll the dough into a log, beginning on the long side. Stretch the log slightly after it is rolled. Cut the log into 2 Inch pieces and place them in the greased muffin pan (or pan with cupcake liners).

5. Bake at 375*F for 18-20 Minutes, or until golden brown. Allow them to cool for 5 minutes before removing them from the muffin pan.

6. Drizzle with icing, and ENJOY!